Happy holidays, everyone! I'll be traveling and celebrating through January 4th, but look forward to sharing lots of new recipes and stories with you in the New Year.
Until then, be well and happy!
Friday, December 25, 2009
dedication
from Colleen Patrick-Goudreau's The Vegan Table:
My hope is that we can all navigate through this world with the grace and integrity of those who most need our protection.
May we have the sense of humor and liveliness of the goats, the maternal instincts and protective nature of the hens, and the sassiness of the roosters. May we have the gentleness and strength of the cattle, the wisdom, serenity and humility of the donkeys. May we appreciate the need for community as do the sheep and choose our companions as carefully as do the rabbits. May we have the faithfulness and commitment to family of the geese and the adaptability and affability of the ducks. May we have the intelligence, loyalty and affection of the pigs and the inquisitiveness, sensitivity, and playfulness of the turkeys.
May we learn from the animals what we need to become better people.
Monday, December 21, 2009
canning apple butter
Despite the monstrous snow storm that roared through New York on Saturday, I actually managed to get out and to the market in order to pick up everything I needed for holiday gift-making/canning. Most importantly, six pounds of apples that were destined to be buttered.
I was really surprised because six pounds of apples (which really seems like a lot) cooked down to about 3.5 8-ounce jars... which means, a whole lot of work and very little to show for it. A word to the wise (from the wise?): this will take you all day. And halfway through, you'll probably wonder why you're going to so much effort. Well, friends, the answer is because 1) it's the holidays, and 2) because it's delicious and you'll feel so much better when you're eating it than if you'd just bought an $8 jar at the store.
A few notes: I don't have a slow-cooker, so this is a stove + food processor method. You can, alternatively, throw everything together in a slow-cooker and let it go for a good 8 to 10 hours, then strain it and process it. I also strain by hand, with a fine mesh strainer, but if you have a food mill, you should use that because it's way easier. All spice measurements are approximate. You should adjust them to your taste. Finally, please do not take my processing times as gospel. You can consult a canning guide, like the ones here and here.
apple butter
6 lbs apples, cored and wedged (*do not peel)
3 c apple cider
3 tbs cinnamon
1 - 2 tbs allspice
1 - 2 tbs ground cloves
1 tsp star anise (optional)
1/2c to 3c sugar
juice and zest of 1 lemon
Preheat the oven to 325 degrees.
Put all the apples and the cider in a very large pot and cook it over medium heat until the apples are tender and falling apart (about 15 - 20 minutes). Stir occasionally to prevent sticking. In batches, put the apple mixture in a food processor and blend until smooth.
Pour the blended apples into a large, oven-safe dish or pot. (I actually used my cast-iron skillet and it fit perfectly.) Add the cinnamon, allspice, cloves, and anise to the apples and adjust to taste. Stir well and add the lemon juice and zest. Put the pot in the oven and let it cook, uncovered for at least 45 minutes. As the apples cook down, they will become sweeter, so I recommend waiting at least this long before adding the sugar, which you should add to taste. I used about 3/4c total. Stir well, and return to the oven for 3 hours, checking and stirring occasionally. The butter is done when it is a spreadable consistency, and there are no pools of water on the top after it's stirred.
Once the butter has cooked down completely, remove it from the oven. Place a fine-mesh strainer over a large pot and, using the back of a spoon, press the butter through the strainer. You'll need to clean off the strainer every so often and, I found, that working in smaller batches was the easiest and most successful. Keep the leftovers (what wouldn't press through the strainer) in a bowl nearby. I recommend, if you have the time, straining the leftovers a second time. I got another 50% of butter the second time around.
If you aren't canning, either freeze the apple butter, or refrigerate it for up to a week.
If you're canning, heat the apple butter until boiling, fill 8-ounce jars and process each one for 10 minutes in a boiling water bath. If your jars don't seal, you can re-process them with new lids within 24 hours, or just refrigerate the jar and use it soon.
Tuesday, December 15, 2009
applesauce and latkes
On Friday night, G. and I were lured to midtown by a Mexican restaurant advertising a Hanukkah menu. Being two very enthusiastic Mexican food lovers, we bundled up and headed north. The menu featured a Mexican latke trio, brisket tacos, and a jelly donut with dulce de leche dessert. The latkes were thin and crispy, and were paired with Mexican dipping sauces (cilantro and lime, chipotle, and I think the last one was some sort of horseradish cream). G. loved the brisket tacos (I ordered mushroom), and we opted for churros over the jelly donut, which, while not traditional holiday fare, were delicious nonetheless.
Saturday was spent prepping for our party, and preparing a menu of our own: applesauce, jelly donut cupcakes (which I think were the crowd favorite), latkes, and mulled wine.
My applesauce is essentially a non-recipe. I used six pounds of apples (mix varieties), peeled them, chopped them, tossed them in a soup pot and cooked it all down over medium-low heat for about three hours. The longer you cook the sauce, the more the apples will break down, so just remove it from heat whenever you like the consistency. Normally, I like it with chunks of apples, but I let this batch cook down further because it was going with latkes. You can also easily add any spices you like: cinnamon, cloves, allspice. If your apples start to stick to the bottom, or if the applesauce gets too thick as it cooks down, add water about ¼ c at a time, stirring as you go. The water will keep cooking off, so check it occasionally and give it a stir to prevent sticking.
For the latkes, we’d planned to do two batches, one vegan and one with eggs, but the vegan ones were such a hit that we just went with it. In place of eggs, the thickening/sticking agent is cornstarch (you could also use potato starch), and they are seasoned simply with salt and pepper. To make these gluten-free, you can substitute an alternative flour, though I haven’t tried it, so I can’t vouch for their texture.
Latkes
3 lbs potatoes, peeled and shredded
1 medium white or yellow onion
¼ c cornstarch
about 1 c flour
salt and pepper
If you have a food processor, fit it with the grating disc and shred all the potatoes and the onion. If you’re hand-grating, grate the potatoes, then dice the onion as small as you can get it. Rinse the potato shreds well, then squeeze out as much liquid as possible. (This step is important, and will keep your latkes crispy and not soggy.) Mix together the potato and onion and add the cornstarch. Mix well and let sit for 5 to 10 minutes. Season well with salt and pepper. Add flour gradually until the mixture becomes sticky and holds together.
Heat a cast-iron skillet with vegetable oil over high heat. You want the pan and oil to be hot, but not smoking. Form small balls of the potato mixture and press them very flat. (You want them pretty thin, or else they’ll be doughy and mushy on the inside.) Fry the pancake on both sides until golden and crispy, adding oil as necessary. Drain latkes on brown paper bags (they hold more oil than paper towels). Sprinkle with additional salt to taste.
Serve hot with sour cream and applesauce.
Friday, December 11, 2009
holiday gifts
I have so many people on my gift list that it's hard to keep it all straight. I also have about twelve different running lists of appropriate gifts for each one of these people. While I don't generally follow gift guides of any sort (does anyone, really?), I'm posting some of the things I've come across this year that might be helpful if you find yourself in a similarly overwhelmed position.

Stainless steel straws from Brook Farm General
These clever and good-looking straws would make a nice hostess gift

A subscription to Ed Behr's The Art of Eating
This magazine would make a great gift for any travel-loving, food enthusiast.

Useful Towel from Bailey Doesn't Bark
I'll never learn conversions, and this beautiful towel would keep me from running to Google each time I encounter grams!

How to Pick a Peach by Russ Parsons
This book should be in absolutely everyone's arsenal. You'll know how to pick fresh produce, and, more importantly, how to store it. (Keep broccoli tightly wrapped; cut the tops off of carrots to keep them from dehydrating; never refrigerate a tomato.) I reference this book at least once a week, and I learn something new each time.

Himalayan Salt Slab from Sur La Tabla
I'm intrigued! You can use this brick of salt directly on the stove or grill, as it heats slowly without melting, salting your food as it cooks.
These clever and good-looking straws would make a nice hostess gift
This magazine would make a great gift for any travel-loving, food enthusiast.
I'll never learn conversions, and this beautiful towel would keep me from running to Google each time I encounter grams!
This book should be in absolutely everyone's arsenal. You'll know how to pick fresh produce, and, more importantly, how to store it. (Keep broccoli tightly wrapped; cut the tops off of carrots to keep them from dehydrating; never refrigerate a tomato.) I reference this book at least once a week, and I learn something new each time.
I'm intrigued! You can use this brick of salt directly on the stove or grill, as it heats slowly without melting, salting your food as it cooks.
latkes
We are busy planning Saturday's holiday party menu, and I am so excited to spend all day tomorrow in the kitchen. We're doing latkes and applesauce, and I want to make cider doughnuts. We're also going to mull wine and maybe cider. And, I need to get on top of my holiday canning... there's a lot to do!

G. told me that the trick to latkes is to rinse away the starch after you've shredded the potatoes. (I never knew this and G. has funny story about an aunt who makes famously-grey potato pancakes.) I'll post the full recipe and report after the weekend. Until then, Happy Hanukkah, everyone!
Image via NYT
G. told me that the trick to latkes is to rinse away the starch after you've shredded the potatoes. (I never knew this and G. has funny story about an aunt who makes famously-grey potato pancakes.) I'll post the full recipe and report after the weekend. Until then, Happy Hanukkah, everyone!
Monday, December 7, 2009
gifting
This inevitably happens every year... I put a lot of energy into gift-giving, and spend hours and hours brainstorming until I find myself with list after list of ideas and absolutely no direction. With two weekends left before the holiday, it's time to make a decision. While I was looking around for canning ideas, I came across this over at Apartment Therapy:

A DIY herb garden! Not only is this a great idea all on its own, but I think it would be made even better alongside any number of canned items. (My list, as it stands: apple butter, applesauce, pickled beets, roasted red peppers, and vanilla syrup.) Recipes to come!
A DIY herb garden! Not only is this a great idea all on its own, but I think it would be made even better alongside any number of canned items. (My list, as it stands: apple butter, applesauce, pickled beets, roasted red peppers, and vanilla syrup.) Recipes to come!
vegetable pizza
This weekend, we got the first snow of the season in New York. It was heavy and wet, and melted by midnight, but for the first time, it actually felt like winter. On Saturday night, after a few hours at the Whiskey Ward with an old friend, I went home to a cold apartment. Wanting to turn on the oven, but also aiming for something effortless, I opted for homemade pizza.
I'd never made dough from scratch before, but knew that the dough was simple: flour, yeast, water, salt. (Olive oil for flavor.) If I've learned anything in the past few months, it's that the simplest things are often the most difficult to execute, as they rely on a perfected balance of few elements. Case and point: my crust. The flavor was amazing; I used Mark Bittman's basic dough recipe, and added fresh garlic, thyme, basil and rosemary. The herbs grounded the more robust and earthy flavors of the toppings: eggplant, squash, and roasted red peppers. The sauce was one I'd canned a few weeks ago, and was spicy with chili and slightly sweet from reduced balsamic.
The texture of the crust was less successful, and the whole thing stuck to the pizza stone. The edges of the crust came out fully baked, crispy on the bottom and doughy on top. The center, however, was too wet, and didn't brown on the bottom. In the future, I would pre-bake the crust for at least 5 minutes, and I would well-oil the baking surface. I'd also pat all the vegetables dry.
Here's to hoping for future success:
basic pizza dough
Mark Bittman
1 tsp (1/2 packet) active dry yeast
3 c all-purpose flour
2 tsp salt
1 to 1 1/4 c water
2 tbs olive oil
fresh thyme, oregano, garlic (1 clove), basil
black pepper
Add the yeast, flour, and salt to the food processor and process for a minute until well-mixed. Add the herbs, and process again. With the machine on, add the 1 c water and 2 tbs of oil through the feed tube.
Process for about 30 seconds, adding more water, a little at a time, until the mixture forms a ball and is slightly sticky to the touch. If it is dry, add another tablespoon of water and process for another 10 seconds. (In the unlikely event that the mixture is too sticky, add flour, a tablespoon at a time.)
Turn the dough onto a floured work surface and knead by hand for a few seconds to form a smooth, round dough ball. Grease a bowl with the remaining olive oil, and place the dough in it. Cover with plastic wrap or a damp towel and let rise in a warm area until the dough doubles in size. (*You can cut this time short, if you like and are in a hurry, or slow it down by placing the bowl in the refrigerator.)
Once risen, place the dough on a well-oiled baking surface and, working from the center, push the dough out to form the crust to the thickness of your liking. Brush the edges with olive oil and sprinkle with salt. Bake, with toppings, for 10 - 15 minutes (or to your desired crispness).
Friday, December 4, 2009
holidaze
I am in full-on, non-stop, pre-holiday brainstorming mode. While finalizing the recipe I'm going to use for apple butter (coming soon), and reading up on the canning methods so it can be gifted in time, I'm also planning to veganize some of my favorite holiday goods. Namely, stollen and soda bread. Christmas morning at our house has always started with a warm loaf of Irish Soda Bread that my mom had always prepared the night before. It's always been one of my favorite things, and I think that's why it's taken me six or seven years to try to change the recipe.
Soda bread is so-called because it uses baking soda as a leavening agent, in place of yeast. The key ingredient in the fairly simple recipe is buttermilk, which contains the lactic acid needed to react with the baking soda. While you can curdle soymilk to emulate the tang of buttermilk, I admittedly have reservations about messing with such simple chemistry. But, I love it and I miss it, so I'm going to give it a shot.
My mom's recipe also uses raisins and a to-be-omitted egg wash. Many recipes call for caraway, which we've never used, making our bread more sweet than savory. The dough is traditionally shaped into a ball and baked on a sheet or stone, with a cross sliced into the top. Stay tuned for the adaptation, and cross your fingers for success!
Wednesday, December 2, 2009
in season: cider cocktails
For me, cooking in the winter is best done with a wooden spoon in one hand and a seasonal cocktail in the other. I also really enjoy the challenge of pairing the drinks with the meal. The cider vendors at the market are still going strong in December, offering not only gallons, but hot, single cups for a dollar. (And I usually spring for both.)
While I love cider, hot or cold, all on its own, it also makes for some of the year's most remarkable (and remarkably simple) libations.
apple brandy and cider

image via Martha Stewart Living
1/2 c apple cider
1/2 c apple brandy (preferably Laird's Applejack*)
2 tbs dry vermouth
Few dashes bitters
orange twists for garnish
Combine all ingredients, divide between two glasses, and garnish with orange.
sparkling cider and cognac

image via Martha Stewart Living
2 tbs cognac (we like Remy Martin)
1 c chilled hard apple cider (the better the cider, the better the end result, but we've used Woodchuck in a pinch)
Pour the cognac into the bottom of two glasses (1 tbs each), and top with hard cider. Finish with a dash of bitters, if you like.
*Laird's is America's oldest family of distillers and their Applejack isn't actually straight apple brandy (which is distilled from concentrated hard cider). It's blended with 65% whiskey: unique and delicious.
While I love cider, hot or cold, all on its own, it also makes for some of the year's most remarkable (and remarkably simple) libations.
apple brandy and cider
image via Martha Stewart Living
1/2 c apple brandy (preferably Laird's Applejack*)
2 tbs dry vermouth
Few dashes bitters
orange twists for garnish
Combine all ingredients, divide between two glasses, and garnish with orange.
sparkling cider and cognac
image via Martha Stewart Living
1 c chilled hard apple cider (the better the cider, the better the end result, but we've used Woodchuck in a pinch)
Pour the cognac into the bottom of two glasses (1 tbs each), and top with hard cider. Finish with a dash of bitters, if you like.
*Laird's is America's oldest family of distillers and their Applejack isn't actually straight apple brandy (which is distilled from concentrated hard cider). It's blended with 65% whiskey: unique and delicious.
Tuesday, December 1, 2009
butternut squash with toasted couscous, cranberries and walnuts
With one half of the holidays over, I'm finding myself investing more and more time with the "what would they really love?" question and far less with, "what's for dinner?" I've also been away so much that catching the market on Saturdays has become harder and harder to do. (excuses, excuses...)
I had even let this one butternut squash sit in a basket on the counter for two weeks. Lucky for me, the squashes are resilient and long-lasting, and it in all probability would have made it through the entire winter. Nonetheless, for produce in my kitchen, two weeks is a long time. This recipe was an on-the-spot improvisation, inspired mostly by the new sage plant I'd picked up. I've often cooked this squash with sage, but it was always dried, and I was excited to try it fresh. This dish is really easy to throw together, and I lad all the ingredients on-hand. If you have a gluten allergy/intolerance, you can easily substitute any grain you prefer. (Same goes for the walnuts.)
butternut squash stuffed with toasted couscous, cranberries and walnuts
1 medium-sized butternut squash
1.5 c couscous (or one box)
1 small onion, diced
2 stalks celery, diced
1.5 c vegetable broth
handful dried cranberries
1/4 - 1/2 c chopped, fresh parsley
7 - 10 leaves fresh sage
handful chopped walnuts
s/p
Slice the squash in half lengthwise, scoop out the seeds, and roast for about 30 minutes until just tender. While the squash is roasting, prepare the couscous.
In a medium-sized saucepan (with a lid), saute the onion and celery in some olive oil with a little salt and pepper. Add about half of the fresh parsley and stir. Add the dry couscous and toast for about 3 - 4 minutes, until it begins to brown. Add the vegetable broth, the cranberries and the rest of the parsley, and bring to a boil. Immediately remove from heat, stir, and cover until all the water is absorbed.
When the squash is tender, scoop out the flesh, leaving about a 1/4" wall. Add the scooped squash to a skillet with some oil, salt, pepper, and the sage. Saute over medium heat for a minute or two. Add the cooked couscous and stir well to combine. Turn the heat to high and let it cook for a few minutes while the flavors incorporate, seasoning with salt and pepper to taste.
Stuff the mixture into the squash and finish in the broiler for about two minutes (watch carefully so it doesn't burn). Top with some fresh sage leaves and the chopped walnuts, and serve.
Monday, November 16, 2009
shepherd's pie
The weekend has come and gone and, with the exception of a few glitches (including an in accessible lightbulb burnout), everything went smoothly...
By 2p on Saturday, I'd decided to go with the shepherd's pie. It was a rainy day, and seemed fitting for the late-evening meal. The filling of the pie would be root vegetables, mushrooms and homemade seitan in a deep, red wine sauce, and the whole thing would be topped with a puree of Yukon Gold potatoes and celery root, broiled in the oven until golden. The recipe, adapted from one found in Gourmet, was time-consuming, clocking in at over four hours start to finish, and dirtied nearly every dish, bowl and pot in my kitchen. But, oh, was it worth it. I'm not normally self-congratulatory, but this dish was incredible. The stew was rich and dense and aromatic... it was downright seductive. The celery root mixed with the potatoes added a brightness to the topping, and provided a contrasting note to depth of the vegetables and wine. When you find yourself with spoiled plans on a rainy Saturday, or nervously anticipating a few overnight guests, put in the time and give this a shot. It won't disappoint.
Shepherd's Pie
Recipe adapted from Gourmet
for the filling
olive oil
1.5 lbs seitan, sliced thin and patted dry
3 medium leeks (white and pale green parts only), halved lengthwise and sliced 1/2" thick
2 garlic cloves, minced
4 medium carrots, chopped
1 lb cremini mushrooms, quartered
4 medium parsnips, chopped
2 tbs thyme leaves
1 tbs rosemary, chopped
1 bottle red wine (I used Merlot, though something full-bodied is recommended)
3 tbs Earth Balance, softened
3 tbs flour
3.5 c hot vegetable stock
1/2 c chopped fresh parsley
for the topping
2.5 lbs Yukon Gold potatoes
1 medium celery root (celeriac), peeled and chopped into 1" pieces
4 tbs Earth Balance
1 c soy milk
Heat a moderate amount of oil in a large soup pot and brown the seitan in three batches, for 3 to 5 minutes, adding oil between each batch. Transfer to a plate.
Add leeks to the pot with some more oil and cook covered, with a 1/4 tsp of salt, for about 6 minutes until soft. Add garlic and cook until golden and fragrant.
Add mushrooms and a 1/2 tsp of salt and cook, covered, until the mushrooms begin to give off liquid. Stir occasionally to prevent sticking. Add carrots, parsnips, thyme, rosemary, and stir. Cook, covered, until vegetables are just tender. (About ten minutes.) Transfer to a bowl.
Add wine to deglaze the pot and boil until it's reduced to about 1 cup (10/15 minutes). While the wine is reducing, stir together the Earth Balance and flour to form a paste. Once the wine has reduced, add the stock and bring to a simmer. Add the EB/flour mixture, simmer, and stir occasionally for a few minutes until it all thickens. Add the vegetables and seitan, stir, and simmer, covered, for 30 minutes. Then, remove from heat and stir in the parsley.
Almost done! While the stew simmers, peel and chop the potatoes and celery root. Boil them in a large pot until very tender. Reserve 1/2 c of the cooking water, and drain.
Bring the margarine and soy milk to a simmer in a pot until the margarine melts completely. Stir in the cooking liquid, 1 tsp salt and 1/2 tsp pepper. Remove from heat and mash potatoes and celery root into the mixture, until smooth and well-combined. Stir well.
FINISH! Preheat the broiler. Pour the stew into a large casserole dish or cast-iron skillet (I used the cast-iron). Top with the potato mixture and spread evenly. Broil for a few minutes, watching carefully so that it doesn't burn, until the top is golden and crispy.
Serve and enjoy.
Saturday, November 14, 2009
in waiting
It's early Saturday afternoon, and I have out-of-town guests arriving in six hours. This should send me into a flurry of whipping and roasting and chopping and general preparation, but instead, I'm sitting at my kitchen table, flipping through Gourmet (RIP) and feeling altogether uninspired.
Two things. First, I'm not used to cooking for more than two. At all. Tonight's dinner will be for five, and I'm the only vegetarian. So there's that pressure. There's also the pressure of having your good friends come see your new apartment for the first time, and wanting so badly to impress them with a carelessly sophisticated lifestyle (not the truth, which is instead slow-going, quiet, and a little reclusive). So I'm turning over menus in my head. Shepherd's Pie. Butternut squash soup. Brussels and fennel with roasted sweet potatoes. Is a stew or chili or cassoulet to boring? And is it too sloppy to serve if I haven't yet gotten my hands on nice, individual-sized crocks? I still haven't gone to the market; I need to pick up wine. Should I get more cognac so that we can make that hard cider cocktail? (Note to self: post on seasonal cocktails to come! We've come up with some good ones.) Plus, the whole apartment smells like bleach because I cleaned the bathroom this morning. And it's too cold to open the windows to air it out.
It's 12:34p. And that's where we stand. Can't wait to see how it all turns out?! Check in tomorrow. Or Monday. And wish me luck.
Monday, November 9, 2009
jerusalem artichokes
This past Saturday, while picking up onions and potatoes from my favorite stand, I paused in front of a large wooden crate filled with small, knobby roots. The sign above the crate read: Jerusalem Artichokes.

image via Gourmet
Never having heard of them, I was honestly confused; these roots looked more like skinny ginger than any artichoke I'd ever seen. So we asked the man behind the stand, and he explained that jerusalem artichokes (or sunchokes) are actually in the sunflower family, and are harvested at the end of the gigantic flower's life.

Raw, they are said to be similar to water chestnuts or jicama. I'm thinking of sauteeing them lightly with some shallots and serving alongside bitter greens and rice. Stay tuned for the results!
Friday, November 6, 2009
remedy quarterly
I have been sadly slacking in the culinary department lately. A last-minute and impromptu trip to Pennsylvania for Halloween completely threw off my food shopping schedule (I can only make it to the market on Saturdays), and has consequently, thrown off my entire week. This week has been an experiment in eating down the fridge, which isn't as much exciting as it is challenging. Lots of beets. Lots of carrots. Always potatoes. We've been eating a lot of roots, to say the least.
So, in the absence of inspired recipes, I instead bring you: inspired publications!


I recently discovered Remedy Quarterly, a really beautiful start-up publication featuring food, stories, illustrations, and interviews. They haven't printed yet, and are working toward a $3,000 goal in order to fund their 1000 copy run. Their first issue focuses on the theme of home, and they aim to bring their readers "recipes from storied pasts and personal histories" as "the best remedy, the most comfort, the finest nutrition is a heart-warming and stomach-filling meal." In the days when mega-publishers are crumbling, I feel really good about getting behind a great independent publication. Check out their website and, if you like what you see, support them through Kickstarter. Just $7.00 gets you an advance copy of their first issue, and $38 gets you a year-long subscription along with a tote!
Friday, October 30, 2009
delicata squash stuffed with kale and white beans
I don't know what it is about this week, but I'm feeling unusually uninspired. After fifteen minutes of staring at the produce in my fridge, and seconds before just resigning and ordering takeout, I took to Tastespotting, my go-to for these what-to-do moments. (I highly recommend it, for both dinner inspiration and a slow hour at work.) A quick search for kale did not disappoint, as I unearthed a recipe for delicata squash, roasted and stuffed with winter greens and white beans. It was perfect: I had all the ingredients on-hand; it was hearty (and enticingly-photographed), and perhaps most important at this particular moment, it was quick.
Because of its shape, delicata squash is really well-suited for stuffing. You wind up with these perfect little boats which stand up remarkably well to all sorts of fillings. While I stuck with the two ingredient combo, if you're up to it, you could add in chopped walnuts or dried cranberries for texture, and you could top it off with some toasted bread crumbs.
This recipe was adapted from this one over at Cook Local. It will feed two people (1/2 squash each) but easily doubles/triples for a family or crowd.
delicata squash stuffed with white beans and kale
1 medium delicata squash, halved and scooped
1-2 cloves garlic, crushed
1 bunch kale, chopped
1 can white beans (I used navy beans)
1 tbs sage (minced fresh or dried)
olive oil
s/p
Preheat oven to 350 degrees. Brush insides of squash with olive oil, and season with salt and pepper. Place face-down in a baking dish, and bake until just tender, about fifteen minutes. (The squash should be easily pierced by a fork, but not so well-done that it's falling out of the skin.)
While the squash is baking, heat olive oil in a large skillet. Add the garlic and saute for a minute or two. Add the kale and stir well. Saute over medium-high heat until the kale has wilted (about 3 or 4 mintues). Reduce the heat and add the beans and sage. Stir well, and cook together for another few minutes while the flavors incorporate. Season with salt and pepper. (Stir in any additions at this point.)
When the kale is done, remove the squash from the oven, flip it over, and fill each half with the kale/white bean mixture. Top with bread crumbs, if using. Lightly brush with a little bit of oil, and bake altogether for another five minutes. Serve!
*Unlike butternut squashes and pumpkins, the skin of the delicata is very thin, and completely edible.
Tuesday, October 27, 2009
roasted brussels sprouts
This is the season of my discovering love for formerly-eschewed vegetables, and following my successful reconciliation with beets, for the first time ever, I bought brussels sprouts. They were the first of the season, and I only picked up a few; I was skeptical, as the smell of the boiling brussels from my childhood is still etched in my olfactory memory. My dad was the lone brussels eater in my house, and you couldn't get me, or my sisters, far enough away from them.
I honestly had no intention of ever cooking with these tiny cabbages... until a few weeks ago. I was having lunch with a co-worker who had brought in the ones she had made for dinner the night before. They were small and halved, browned at the edges and flecked with fennel and pepper. And they smelled incredible. Was it possible? I was persuaded.
The first night, I roasted my first brussels with olive oil, salt, pepper and shallots until they were tender and caramelized. They were so good. I haven't looked back since.

This week, I bought them on the stalk. Did you know that this is how they grow? I had no idea!


Have a more creative preparation? Submit it to Food52. Their weekly recipe competition features brussels sprouts this week, and, if you win, you'll be included (and given full credit for your delicious idea) in their forthcoming cookbook.
I honestly had no intention of ever cooking with these tiny cabbages... until a few weeks ago. I was having lunch with a co-worker who had brought in the ones she had made for dinner the night before. They were small and halved, browned at the edges and flecked with fennel and pepper. And they smelled incredible. Was it possible? I was persuaded.
The first night, I roasted my first brussels with olive oil, salt, pepper and shallots until they were tender and caramelized. They were so good. I haven't looked back since.
image via Country Living
To roast them, preheat to 350 degrees. Toss your brussels with olive oil, salt and pepper and cook until browned. I like them with shallots, but you could toss in garlic, fennel, or any type of onion. If you're able, try them on the grill! Finish with a little lemon juice, and serve alongside any main course.
Have a more creative preparation? Submit it to Food52. Their weekly recipe competition features brussels sprouts this week, and, if you win, you'll be included (and given full credit for your delicious idea) in their forthcoming cookbook.
Tuesday, October 20, 2009
roasted romanesco
On Sunday night, as we were shaking off the lingering effects of week-long colds, G. and I gave in to our evening cravings for warm drinks and pizza. Around the corner from our apartment is a place called Roberta's. I remember when it first opened a few years ago with a cement facade and barely-visible windows, rumors whispered through the neighborhood... is there really pizza in there? Beyond the cinder blocks, you'll find the warmest, darkest, coziest pizza joint south of Vermont. Formerly an old garage, the space has been renovated with lots of salvaged wood, and decorated with low-lights, wood-burning fireplaces and family-style tables. Roberta's is a rustic retreat, absent of irony and kitsch, nestled in one of Brooklyn's most industrial neighborhoods.

While waiting for a table, we stepped outside to the garden and heated tent, where we ordered Gluhwein (unappetizingly pronounced: glue wine), a German mulled wine, spiced with cinnamon sticks, vanilla pods, cloves, citrus and sugar. The drink is popular in Germany's many open-air Christmas markets. We talked to the bartender about the new roof gardens, built as a series of greenhouses above the restaurant, bringing new meaning to the term local on Brooklyn restaurant menus.
The pizzas, made in a wood-fired oven, have thin, charred crusts which can be finished with any of the menu's inspired toppings: potato, capers, egg. We ordered the Rosso (tomato, oregano, garlic) with onion and mushroom. The whole thing was pitch-perfect: a well-fired crust and onions which maintained their crunch, while the tomato held its own, not to be upstaged by the garlic and oregano.

Also on the menu, though not on our table, was romanesco (with pistachio butter, parsley and guanciale), which inspired me to chop and roast the one I'd picked up on Saturday. This preparation is very straightforward: olive oil, salt, pepper, a little dried chili. The result is delicious. The romanesco's flavor is similar to broccoli and cauliflower, but doesn't taste exactly like one or the other. There's something brighter about its taste. If you ever see this bizarre-looking vegetable at your local market (or restaurant menu), give it a shot. I'll definitely be trying it again.
roasted romanesco
1 head romanesco, stalks removed and florets separated
1 small dried chili pepper, diced
s/p
olive oil to coat
Preheat oven to 400 degrees. Toss romanesco with chili, salt, pepper and olive oil, and roast until browned (about 30 minutes), stirring once. Serve as a side, or with any grain.
Saturday, October 17, 2009
shopping list
Union Square Green Market
10/17/09

1 head kale
1 pint shallots
1 leek
1 bunch beets
1 bunch carrots
1 head romanesco
1 yellow onion
3 gala apples
1 honey crisp apple
2 asian pears
1 loaf french sourdough
5 lbs potatoes
2 heads garlic
1 1/2 gallon apple cider


ideas for the week: potato, kale and leek soup; roasted romanesco with wild rice
Friday, October 16, 2009
roasted butternut squash with chili and lime
It is cold in New York City. Yesterday, we could see snow from our 10th floor office. Even if it melted before it hit the ground, yesterday it was cold enough to snow! With temperatures in the low 40s for days, I've been drinking lots of hot cider, pulling flannel blankets onto the bed, and putting the oven to good use. This time of year, when the sky is grey and the sweaters come out, one of my favorite things to cook and eat are roasted vegetables. The way that squashes and brussels and romanesco and onions caramelize in the oven is, to me, quintessentially autumn.
Last night, I chose butternut squash. I wanted something with a kick to balance out the sweetness, so I whisked up a glaze of chili pepper and lime. The spice is present, but subtle, not overpowering the traditional honeyed notes of the squash, and the sweet browned edges of each bite round out the mild acidity of the lime.
A note on preparation: there is probably an easier way to cut apart the squash than the way I went about it last night. Wanting to roast in cubes, I sawed the whole thing into slices, then cut off the skin, then chopped it into bite-sized chunks. It was tough, even with sharp knives. It would have been simpler had I roasted the squash briefly before cutting it apart, but I was impatient. Proceed however you see fit.
roasted butternut squash with chili lime glaze
1 medium butternut squash, cubed
1/4 c olive oil
juice of 1 lime
1/4 tsp cayenne
1 dried chili, minced
very small pinch of hot curry powder
s/p
Preheat oven to 400 degrees. Whisk together olive oil, lime juice and chili. Toss, with squash, in a baking dish until well-coated. Sprinkle with cayenne and curry and toss again. Top with salt and pepper. Roast for 30 minutes, or until tender. Adjust seasonings, and finish with a small drizzle of maple syrup. Serve with wild rice, toasted quinoa, or any protein.
Wednesday, October 14, 2009
don't perish
Artists Joseph Montgomery and Jesse Willenbring have curated Don't Perish, a food + art project at Leo Koenig this month. The proposition of the exhibition is simple: "In order to understand the work, get to know it, we invite our friends and strangers to look at the work with us over a meal."
Twice a week for the month of October, the artists will host a potluck dinner open to anyone who shows up at the door with a dish. (There is also a makeshift pantry collecting non-perishables for the NYC Food Bank.) The meal is eaten family-style, while visitors sit and share and talk about the work on the walls.
 image via Leo Koenig Inc. Projekte
I'll be attending the final dinner, this Saturday evening. Between now and then, I'll have to brainstorm gallery potluck appropriate foods... If you're in the area, you should come, too. More thoughts (and pictures, hopefully) to follow.
roasted beets and carrots with smashed potatoes
Yesterday, we welcomed an exciting (and much-anticipated) addition to our little kitchen: an island! We'd ordered a kitchen table and island about six weeks ago, and by now, had given up any hope that they would actually arrive. These pieces (which are completely gorgeous) have more than quadrupled the cooking/prep space. I am more giddy than you can imagine.
I am embarrassed to admit that I did not christen them properly with an elegant and elaborate meal.
 Ogunquit, Maine
G. and I had been out of town for the holiday weekend and there the fridge and pantry were practically empty upon our return. I found three small beets, three carrots, a cippollini, and a few pounds of new and fingerling potatoes. This turned out to be a very fall-feeling dinner (complete with a carved pumpkin centerpiece!) and came together quite well despite scant ingredients. (I feel obligated to note that I am a recent beet-convert. I remember a few months ago when the Times was raving about beets... beet soup! roasted beets! beet salad! pickled beets! beets beets beets! It took me until this past summer to finally give up the ghost of beets-in-a-can and see what these roots were really all about. Turns out, they're all about being delicious. If you, like me, have been scared off because of early pickled beet experiences, it's time to move on. It's worth it!)
roasted beets and carrots
3 small - medium beets, peeled and quartered*
3+ medium carrots, peeled, cut into large chunks
1 tsp fresh rosemary, diced
s/p
olive oil
Preheat oven to 450 degrees. Toss beets and carrots with olive oil in a small baking dish. Sprinkle with sea salt, pepper and rosemary. Roast for 30 minutes, or until tender, stirring occasionally to prevent sticking. Adjust salt and pepper when you serve, to taste, and finish with a squeeze of lemon if you like.
smashed potatoes
about 15 small, new/fingerling potatoes, scrubbed well
2 bay leaf
1 small cippollini (or shallot), sliced into half-moons
1/4 c (or less) soy milk
olive oil
s/p
Boil potatoes with the bay leaves for 30 minutes, or until tender. Reserve about 1/4 c of the water, remove bay leaves, drain the potatoes, and set aside. In a medium saucepan, saute the onion until golden and crispy. Add potatoes and smash with a few tablespoons of olive oil. Add soy milk and the reserved water gradually until you reach your desired consistency. Season with salt and pepper to taste, top with paprika and serve.
*If you wash your hands immediately, or even peel the beets under cold running water, you'll have less trouble with stains on your skin and nails. Still be very careful to avoid contact with fabrics, though.
I am embarrassed to admit that I did not christen them properly with an elegant and elaborate meal.
 Ogunquit, Maine
roasted beets and carrots
3 small - medium beets, peeled and quartered*
3+ medium carrots, peeled, cut into large chunks
1 tsp fresh rosemary, diced
s/p
olive oil
Preheat oven to 450 degrees. Toss beets and carrots with olive oil in a small baking dish. Sprinkle with sea salt, pepper and rosemary. Roast for 30 minutes, or until tender, stirring occasionally to prevent sticking. Adjust salt and pepper when you serve, to taste, and finish with a squeeze of lemon if you like.
smashed potatoes
about 15 small, new/fingerling potatoes, scrubbed well
2 bay leaf
1 small cippollini (or shallot), sliced into half-moons
1/4 c (or less) soy milk
olive oil
s/p
Boil potatoes with the bay leaves for 30 minutes, or until tender. Reserve about 1/4 c of the water, remove bay leaves, drain the potatoes, and set aside. In a medium saucepan, saute the onion until golden and crispy. Add potatoes and smash with a few tablespoons of olive oil. Add soy milk and the reserved water gradually until you reach your desired consistency. Season with salt and pepper to taste, top with paprika and serve.
*If you wash your hands immediately, or even peel the beets under cold running water, you'll have less trouble with stains on your skin and nails. Still be very careful to avoid contact with fabrics, though.
Wednesday, October 7, 2009
weekend festivals
This past weekend celebrated two of my favorite things in New York City, in festival form: chile peppers and pickles.


On Saturday, rainy and dreary as it was, the Brooklyn Botanical Gardens hosted their annual Chile Pepper Fiesta. We spent most of our time in the chile + chocolate tents, tasting from artisanal chocolatiers like Taza (incredible, authentically stone-ground chocolates) and Fine & Raw (raw, unprocessed, totally vegan, totally delicious). There were many other craft chocolatiers, but these were really the stand-outs in my mind. We left with the two-piece bon bons from Fine & Raw, a pint of horseradish pickles from Horman's Best Pickles and a bag of yellow split pea fritters, kind of like Indian-spiced hush puppies. I cannot, for the life of me, remember the name of the vendor!

chili/chocolate bon-bons from Fine & Raw

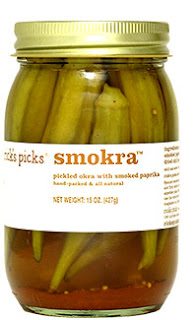
Sunday brought the International Pickle Festival to a Lower East Side parking lot. The rain had the benefit of scaring off a lot of visitors from the Botanical Gardens. Sunday was beautiful. And completely packed. People were waiting in lines twenty deep for samples. My patience was tested, and ultimately, we didn't last long. I did manage to get my hands on some of Rick's Picks Smokra. SO GOOD. I also managed a peanut butter + pickle sandwich (better than expected) and some really amazing, barely pickled beets. Unfortunately, the afternoon was such a blur, I haven't retained any of the names of the different picklers. Such is life.

These festivals were sandwiched in between openings and performances, Free Fridays at MoMA, and a trip to the farmer's market; come Sunday night, I felt so literally dizzy and reasonably exhausted, that I just wanted to curl up on the couch with a cup of something warm and cozy. So I started a batch of chili.
Every time I make this, it's a little different, but the core ingredients are the same. Feel free to add any other vegetables and bean varieties. Black and kidney beans are traditional, but you could use any type you like. This also freezes really well, and tastes great the next day.
Two Bean Chili with Corn
1 clove garlic
1 medium onion, diced
3 medium carrots, diced
3-4 stalks celery, diced
4 - 10 chile peppers, diced (I always use a variety, whatever I've happened to pick up. Choose what you like and adjust for your heat tolerance accordingly.)
1 green bell pepper, diced
kernels from 3 ears corn
1 16 oz can crushed tomatoes
1 16 oz can kidney beans
1 8 oz can black beans
1 can/bottle beer (preferably lager)
3 tbs chili powder
1 - 2 tsp cayenne
1 tbs cumin
1 tbs black pepper
1 tsp hungarian paprika (sweet or smoked)
salt to taste
scallions to garnish
Saute onion, carrot, celery and garlic in olive oil in the bottom of a very large pot. Cook until onions are translucent and fragrant. Add chile and green peppers, saute for another few minutes. Add the can of crushed tomatoes and stir well. Bring to a boil. Stir in both beans and the corn. Bring to a boil again. Add the chili powder, cayenne, cumin, pepper, and paprika and stir well. Reduce to simmer and cook, uncovered, for 15 minutes. Stir again, and add the beer.* Allow the whole thing to cook for at least a half hour, preferably an hour. The longer the chili cooks, the more the flavors will develop and the heat of the chilies will change. Adjust the seasonings as needed. Salt to taste. Top with chopped scallions and serve in a large mug.
*I've never used beer in chili prior to this week. I'd seen it used in a number of recipes, and had some in the fridge so figured I'd give it a shot. This batch of chili was really, really good, but I can't say for sure what role the beer played. That in mind, feel free to leave it out, and add water to reach your desired consistency.


On Saturday, rainy and dreary as it was, the Brooklyn Botanical Gardens hosted their annual Chile Pepper Fiesta. We spent most of our time in the chile + chocolate tents, tasting from artisanal chocolatiers like Taza (incredible, authentically stone-ground chocolates) and Fine & Raw (raw, unprocessed, totally vegan, totally delicious). There were many other craft chocolatiers, but these were really the stand-outs in my mind. We left with the two-piece bon bons from Fine & Raw, a pint of horseradish pickles from Horman's Best Pickles and a bag of yellow split pea fritters, kind of like Indian-spiced hush puppies. I cannot, for the life of me, remember the name of the vendor!

chili/chocolate bon-bons from Fine & Raw

Sunday brought the International Pickle Festival to a Lower East Side parking lot. The rain had the benefit of scaring off a lot of visitors from the Botanical Gardens. Sunday was beautiful. And completely packed. People were waiting in lines twenty deep for samples. My patience was tested, and ultimately, we didn't last long. I did manage to get my hands on some of Rick's Picks Smokra. SO GOOD. I also managed a peanut butter + pickle sandwich (better than expected) and some really amazing, barely pickled beets. Unfortunately, the afternoon was such a blur, I haven't retained any of the names of the different picklers. Such is life.

These festivals were sandwiched in between openings and performances, Free Fridays at MoMA, and a trip to the farmer's market; come Sunday night, I felt so literally dizzy and reasonably exhausted, that I just wanted to curl up on the couch with a cup of something warm and cozy. So I started a batch of chili.
Every time I make this, it's a little different, but the core ingredients are the same. Feel free to add any other vegetables and bean varieties. Black and kidney beans are traditional, but you could use any type you like. This also freezes really well, and tastes great the next day.
Two Bean Chili with Corn
1 clove garlic
1 medium onion, diced
3 medium carrots, diced
3-4 stalks celery, diced
4 - 10 chile peppers, diced (I always use a variety, whatever I've happened to pick up. Choose what you like and adjust for your heat tolerance accordingly.)
1 green bell pepper, diced
kernels from 3 ears corn
1 16 oz can crushed tomatoes
1 16 oz can kidney beans
1 8 oz can black beans
1 can/bottle beer (preferably lager)
3 tbs chili powder
1 - 2 tsp cayenne
1 tbs cumin
1 tbs black pepper
1 tsp hungarian paprika (sweet or smoked)
salt to taste
scallions to garnish
Saute onion, carrot, celery and garlic in olive oil in the bottom of a very large pot. Cook until onions are translucent and fragrant. Add chile and green peppers, saute for another few minutes. Add the can of crushed tomatoes and stir well. Bring to a boil. Stir in both beans and the corn. Bring to a boil again. Add the chili powder, cayenne, cumin, pepper, and paprika and stir well. Reduce to simmer and cook, uncovered, for 15 minutes. Stir again, and add the beer.* Allow the whole thing to cook for at least a half hour, preferably an hour. The longer the chili cooks, the more the flavors will develop and the heat of the chilies will change. Adjust the seasonings as needed. Salt to taste. Top with chopped scallions and serve in a large mug.
*I've never used beer in chili prior to this week. I'd seen it used in a number of recipes, and had some in the fridge so figured I'd give it a shot. This batch of chili was really, really good, but I can't say for sure what role the beer played. That in mind, feel free to leave it out, and add water to reach your desired consistency.
Wednesday, September 30, 2009
my life in food
This past weekend, my sister came to visit from Vermont, and brought with her possibly the most perfect housewarming gift: a copy of Judith Jones' My Life in Food and a Lodge cast iron skillet. I started the book on Sunday, and, if it weren't for a day job, I wouldn't put it down. Jones recounts her time spent in Paris in the late 40s, her first encounters with true French food and how this entire experience shaped her life and her ideas about cooking. I picked up My Life in Food shortly after re-reading "Goodbye to All That" --- Joan Didion's essay on coming to, and ultimately leaving, New York. Both of these women write about a sense of abandon, a surrender to what it is to be in your twenties, just getting by. A graceful carelessness. Either this attitude is lost on my generation, or writing about one's early twenties in a new city is inherently romantic and nostalgic. Probably a little bit of both.
In my early twenties, I find myself writing at work (with no sense of any possible consequences) and spending my eight-hour days dreaming up dinners and sauces and sides. Last week was spent planning the menu for a Saturday evening housewarming party (white bean spread on crostini, rosemary crackers, toasted pepitas), and yesterday, I brainstormed how to use up the oyster mushrooms that had been in my fridge for a few days too long. Most likely inspired by Jones' stories of rich, French food, I thought that they would be best served with shallots and potatoes in a red wine sauce. Unfortunately, I got home to find cipollinis where my shallots usually are, and an open bottle of white wine in the fridge. Not wanting to crack open the nice bottle of shiraz we'd received as a housewarming gift, I decided, like most other days, that I'd have to be adaptable. I'd make it work.
What I wound up with, while not what I necessarily had in mind, was delicious in its own right. The white wine reduction, poured over browned potatoes and onions flecked with mushrooms, pushed the dish into this rich, buttery field that I didn't even know was possible with olive oil. While a red wine sauce would have resulted in a deeper flavor, the white wine's complexity was on the surface, and it was fantastic.
Potatoes, Onions and Mushrooms in White Wine Reduction
10-15 any small, fingerling potatoes, cut into large chunks*
2 medium cipollini onions, large chunks
2 - 4 large oyster mushrooms, roughly chopped
1/4 tsp rosemary, finely diced
1/4 tsp, or less, salt
pepper to taste
1/2 cup+ white wine (I used a pretty cheap Chardonnay)
chopped fresh flat-leaf parsley to garnish
Over medium-high heat, saute the potatoes, onion and mushrooms in a good amount of olive oil. Stir frequently to prevent sticking and cook until potatoes and onions begin to brown (5-7 minutes). Once browned, add a 1/4 c water to the pan and cover, reducing to simmer. Cook until potatoes are tender, stirring occasionally and adding more water if necessary (about 15 minutes). When potatoes are tender, and water has cooked off, transfer potatoes/onions/mushrooms to a plate or platter and set aside. Turn heat to high and deglaze pan with wine, scraping up all the browned bits on the bottom and sides of your skillet. Allow to reduce briefly (no more than 5 minutes). Pour sauce over potatoes, top with chopped parsley and serve.
*A note on potatoes: G. and I frequently buy a wide variety of heirloom potatoes mostly because it's fun to use different shapes, sizes and colors. Beyond noticing that a particular variety of fingerling was waxier, and retained a better shape, the taste differences between them are negligible. BUT! If you ever, ever see Adirondack Blues... get them. These were, hands down, the most buttery, melt-in-your-mouth potatoes I have ever tasted. Believe me. I didn't know that a potato could taste like butter. It can. It really, really can.
Wednesday, September 23, 2009
breakfast potatoes
I have an over-zealous love for potatoes. Baked, fried, roasted, boiled, mashed, or any combination within... I could eat them every day.
There's a stand at the market that specializes in root vegetables. They have the best beets, onions, carrots, and potatoes, in every color of the rainbow, in the entire city. Every week, I fill up a bag with handfuls from each bin: La Ratte, Adirondack Blues, Austrian Crescent, Belle de Fonteney, and on Sunday morning, they become one of my most favorite and simple dishes: breakfast potatoes.
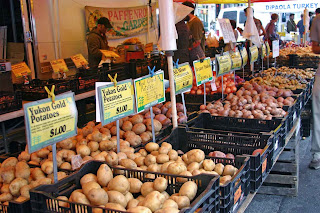
The guts of this recipe are simple: potatoes, onion, chilies, rosemary, salt, pepper and a few other spices. It holds up remarkably well to whatever you have in your spice rack or lurking in your vegetable drawer. I've thrown in kale, tomatoes, curry powder, mustard seed. Adapt away.
Sunday Brunch Potatoes
10 smaller, mixed heirloom potatoes, chopped bite-size
1 shallot (or other small onion), chopped
1 small, hot chili, finely diced
1/4 tsp (few shakes) each of chili powder, cayenne pepper, sweet hungarian paprika
sprig fresh rosemary (or dried, crushed between your fingers), diced
s/p to taste
Pour a generous amount of good olive oil in a large skillet. Add shallot, saute briefly. Add potatoes and stir until all are well covered with oil. Add chili. Stir and cook for five minutes. Add spices and rosemary, stir, and cook for another fifteen minutes. Season with s/p to taste. Cover and cook until all potatoes are tender, stirring occasionally to prevent sticking.
shopping list
Sep 19, 2009
1 bunch mixed-color carrots
1 pint sun sugar tomatoes
1 bunch red beets
1 bunch arugula
1/4 lb greens
2 baby zucchini
4 small, globe eggplants
3 honey crisp apples
3 gala apples
3 asian pears
3 nectarines
ideas for the week: roasted beets with arugula and apple, carrot ginger salad
1 bunch mixed-color carrots
1 pint sun sugar tomatoes
1 bunch red beets
1 bunch arugula
1/4 lb greens
2 baby zucchini
4 small, globe eggplants
3 honey crisp apples
3 gala apples
3 asian pears
3 nectarines
ideas for the week: roasted beets with arugula and apple, carrot ginger salad
Monday, September 21, 2009
homemade tortillas
Yesterday was spent helping a good friend chop, saute and simmer all afternoon in preparation of a dinner party. We talked about how, at least for us, cooking with a friend would either make or break the relationship, depending on each person's distinct kitchen personality and adaptability, and how recently, we've noticed a trend among our friends and other people our age to rediscover the fun of making things ourselves rather than buying them at the supermarket. Not just dinners and cereals, but pantry basics like tomato paste, cheeses, enchilada, barbeque and hot sauces. There is this rejection of outsourced processing that we've grown up with, which is exciting; this all feels like fresh and new territory, when, in reality, people were making these things in their kitchens for a hundred years before the factories took over. We are beginning to appreciate our food by hand-crafting the contents of our cupboards.
This conversation was inspired by Justine's recent purchase of a tortilla press. We were, each for the first time, going to make tortillas from scratch.
Justine had purchased masa, and the instructions were simple: mix masa with water until a firm dough forms. Form small dough balls, place between two sheets of wax paper, and press. Easy enough. Long story short, twenty tortillas later, we'd figured it out. Justine formed balls and pressed (between plastic wrap, not wax paper), and I cooked them in a hot skillet for about thirty seconds on each side. The trick, I learned, was to lay the tortilla in the skillet for about two seconds on each side, then thirty seconds on each side. I still don't know why, but the quick flip kept one side from cracking. Whatever works.
To stuff the tortillas, we made roasted potatoes with fennel and poblano peppers, grilled green beans, and fried tempeh. On the side, we had fried green tomatoes and African Tomato Peanut soup. It sounds like a lot of flavors, and it was, but they were all rooted in seasonality; this was late summer's windfall.
This soup is incredibly easy and so delicious. I was shocked that so few ingredients could work together and create a really complex flavor.
African Tomato Peanut Soup
1 small onion, diced
3 cloves garlic, minced
2 lbs roma tomatoes, skins removed
2 tbs natural peanut butter
2 tsp turmeric
1 tsp minced, dried chilies
s/p to taste
1.5 c cooked basmati rice
Saute the onion and garlic over medium heat until translucent and fragrant. Puree the tomatoes in a food processor and add to the onion and garlic. Bring to a boil. Add the peanut butter, turmeric and chilies and stir well to combine. Simmer for 30 minutes, stirring occasionally. Add salt and pepper to taste. Add water if soup has become to thick, and stir in the rice. Simmer for another 5 minutes and serve.
This conversation was inspired by Justine's recent purchase of a tortilla press. We were, each for the first time, going to make tortillas from scratch.

Justine had purchased masa, and the instructions were simple: mix masa with water until a firm dough forms. Form small dough balls, place between two sheets of wax paper, and press. Easy enough. Long story short, twenty tortillas later, we'd figured it out. Justine formed balls and pressed (between plastic wrap, not wax paper), and I cooked them in a hot skillet for about thirty seconds on each side. The trick, I learned, was to lay the tortilla in the skillet for about two seconds on each side, then thirty seconds on each side. I still don't know why, but the quick flip kept one side from cracking. Whatever works.
To stuff the tortillas, we made roasted potatoes with fennel and poblano peppers, grilled green beans, and fried tempeh. On the side, we had fried green tomatoes and African Tomato Peanut soup. It sounds like a lot of flavors, and it was, but they were all rooted in seasonality; this was late summer's windfall.
This soup is incredibly easy and so delicious. I was shocked that so few ingredients could work together and create a really complex flavor.
African Tomato Peanut Soup
1 small onion, diced
3 cloves garlic, minced
2 lbs roma tomatoes, skins removed
2 tbs natural peanut butter
2 tsp turmeric
1 tsp minced, dried chilies
s/p to taste
1.5 c cooked basmati rice
Saute the onion and garlic over medium heat until translucent and fragrant. Puree the tomatoes in a food processor and add to the onion and garlic. Bring to a boil. Add the peanut butter, turmeric and chilies and stir well to combine. Simmer for 30 minutes, stirring occasionally. Add salt and pepper to taste. Add water if soup has become to thick, and stir in the rice. Simmer for another 5 minutes and serve.
canning 101
Until recently, I’d never canned. Too frightened by botulism-ridden horror stories, I left the endeavor safely in the hands of those more daring than I. When a friend asked me if I’d like to learn a few weeks ago, I hesitated, expressed my fear (to which she responded, you’ll know if your food is bad), got over it and dove in. Lindsey had been canning for a few years, never lost a jar, and with her confident guidance, I felt prepared to give it a shot.
We were making tomato sauce, her own recipe, out of the pounds and pounds of tomatoes she’d harvested from her garden that day.
*Note: many canning recipes I’ve read stick to very strict measurements and pH balances, to ensure the safety of the food you’re preserving. This is much more heirloom-style canning, with techniques passed down through word-of-mouth, and shared between close friends. That in mind, though my sauce was successful and L. has never lost a jar, I cannot vouch for the safety or longevity of this method. Generally, you should not keep home-canned food for longer than a year. This time next year, tomatoes will be in season again, anyway.
What you’ll need:
*This recipe yields 2 quarts of sauce. Increase as needed.
1 very large soup pot
2 quart-sized glass jars with 2 new, clean lids and tightly fitted rings
20 (approx) tomatoes (we used romas)
3+ cloves garlic
1 white onion
1 red bell pepper
1-3 hot chili peppers
1.5 c fresh basil, tightly packed
olive oil
balsamic vinegar
s/p
Chop all tomatoes into small chunks, with skins and seeds. Set aside. Dice onion, garlic and basil very fine. (Seriously, as tiny as you can get it.) Dice the peppers, and set aside.
Saute onion, garlic and basil in your pot with about a tablespoon of oil. You don’t want to fry the onions, but you do want them to become translucent. Stir frequently to prevent sticking/burning. Allow to cook for at least five minutes, until onions and garlic are fully cooked and fragrant. Add tomatoes and stir. Allow sauce to simmer for 15-20 minutes, stirring occasionally. Add peppers, salt and pepper. Stir, and allow to simmer for another 20 minutes. Add a few rounds of balsamic and stir. Allow to cook down for about an hour, stirring occasionally.
Wash and dry two quart jars very well, and line them up next to your pot. Bring the sauce to a roaring boil. (This is important!) Hold the jar with an oven mitt or towel; it will get hot. As quickly as possible, spoon the sauce into the jar, using a funnel if you have one. You should leave approximately half an inch of room. Wipe the rim clean and screw the top on tightly. Repeat with the second jar. In about two minutes, you should hear a distinctive ping when the jar seals. In ten minutes, once the jar has cooled a little, press your fingers on the top. It should not give under pressure. (If the top still clicks, your cap hasn’t sealed and you’ll have to refrigerate it, and use the sauce within a few days, or freeze it for as long as you like.) If your lid is firm, your jar has sealed and will keep on the shelf for up to one year.
Tuesday, September 15, 2009
deconstructed eggplant parmesan
I've been craving eggplant parmesan for a few weeks, but it's been too hot to turn on the oven, so I've resisted... until I picked up the most gorgeous eggplant at the market on Saturday. Weighing in at about 2.5 lbs, it was short and fat, green and striped, looking more like an heirloom tomato than anything else. Parmesan (sans-parmesan) it would be.
Still not wanting to use the oven, I opted for a deconstructed version of this dish. Each of the elements is prepared individually, then stacked on a plate and drizzled with a sweet and tangy balsamic reduction. Frankly, I think this is better than the traditional casserole style. This preparation and presentation allows each ingredient to stand on its own and coordinate with all the others, rather than absorbing a generalized flavor.
Deconstructed Eggplant Parmesan (sans parmesan)
1 medium/large eggplant (traditional, globe... anything except the long, thin japanese ones)
1 1/2 c bread crumbs
2 tbs fresh/dried parsley
1 1/2 tsp salt
1 tsp pepper
1/2 tsp red pepper flakes
1 c warm water
3 tsp potato starch (corn starch would work, too)
3 c tomato sauce (recipe to follow)
1/2 c balsamic vinegar
handful fresh basil
handful cherry tomatoes, quartered (I used sunsugars)
2 - 4 sun-dried tomatoes, oil-packed, coarsely chopped
Slice eggplant into 1/2" rounds. (I'm not an eggplant salter, but if you are, by all means...) Combine warm water with potato starch (I actually used EnerG Egg Replacer, so if you have it, it works). Stir very well, until it becomes frothy. The solution should be slightly more viscous than water. Combine bread crumbs with parsley, salt, pepper and red pepper flakes in a medium bowl. Dip eggplant in the water/starch solution, then press it firmly into the breadcrumbs. Repeat for all slices.
Heat a fair amount of olive oil in a large skillet. Fry eggplant slices until golden and crispy on each side (about four minutes). Eggplant soaks up a lot of oil, especially when it's breaded. Be prepared to use generously, or, if you prefer, you can bake the slices, drizzled with oil, on a baking sheet at 350 degrees for about 20 minutes.
Heat tomato sauce in a small sauce pan.
Time for a balsamic reduction. Pour the balsamic into a small sauce pan and place it over low heat. Using a wooden spoon, stir slowly as the vinegar begins to boil. It will boil fiercely for a few minutes --- keep stirring!! --- while the water cooks off. Continue to stir (if you don't, it will stick and burn), with very low heat, until the vinegar reduces to a very thick, syrupy consistency. It should look a little like chocolate syrup and smell very sweet. Remove from heat.
Place one eggplant slice on a plate, top with a few basil leaves and a spoonful of tomato sauce. Repeat with a second layer. Top with the chopped cherry and sundried tomatoes, drizzle the balsamic glaze along the edge of the plate, and serve.
Monday, September 14, 2009
tomatillo salsa (raw salsa verde)
Having signed our lease at the end of August, we are still in the process of unpacking and procuring furniture. While the kitchen island is en-route from Boston, I've become very accustomed to preparing every meal with about 15 square inches of counter space. Particularly challenging? Last night's tomatillo salsa.
Tomatillo salsa is traditionally blended, whether it's roasted or raw. Our currently ill-equipped kitchen doesn't allow room for a food processor, but luckily, G. is a whisking/vegetable mashing extraordinaire. Black bean burgers, mashed potatoes, red velvet cupcake batter bowls all get handed off to her. She pulverized our tomatillos in about three minutes flat.
A note about tomatillos, if you've never used them before... (which I hadn't until last week). When choosing them, you're looking for a slightly sour/tangy smell and a distinct firmness. If they're soft, they've gone bad. When you get them home, peel the husks and scrub away the sticky film.
If, like me, you are without a blender or food processor, dice your tomatillos as small as possible. Then, pile them together and rock your knife back and forth over and over and over until the juices begin to release and the seeds are dislodged from the flesh. At this point, transport the tomatillos to a medium-sized mixing bowl, squeeze in the juice of half a lime, and take to the whole thing with a potato masher or the back of a wooden spoon. Work the tomatillos until they are soupy and no chunks remain. Then, proceed with the salsa!
Tomatillo Salsa (Raw Salsa Verde)
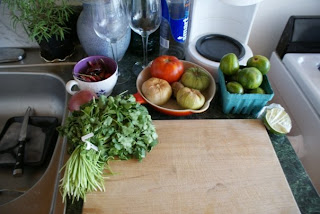
5 - 6 tomatillos, diced then pulverized (or, if you're luckier than me, processed in a blender)
juice of 1 lime
3 medium, firm roma tomatoes (or other smaller variety), diced
1 small red onion, fine dice
1 dried red chili, diced very fine
1 medium-sized, medium-heat chili, diced (with or without seeds, your call)
full handful cilantro, chopped well
s/p to taste
Combine all ingredients and mix well. (If you prefer a more traditional salsa verde texture, throw everything in a food processor and pulse until you reach your desired consistency.) The flavors will meld and develop the longer this is allowed to sit, and it tastes amazing the next day.
zucchini mushroom tacos
This past winter, G. and I spent two months in Los Angeles. While we’ve since readjusted to the climate and sensibilities of our home coast, there is one thing we long for on a near-daily basis: tacos. The place we stayed in for those few weeks was within walking distance of an incredible taco stand called Machos Tacos.
The above plate cost about $4.00.
The above plate cost about $4.00.
Mexican food on the East coast is more complicated, somehow unbalanced and consequently less satisfying. What I appreciated most about West coast food was its straightforwardness. A taco: two tortillas, rice, refried beans, pico, lettuce and guacamole. (Even more straightforward was Best Fish Taco in Ensenada: two fried shrimp folded in a single tortilla, wrapped in foil.) I, however, am unable to exercise such restraint. What follows is one of many attempts to recapture the flavors we were introduced to in January. I added a number of vegetables because summer has ended and we’re facing the prospect of a long winter with no greens.
Zucchini, Mushroom and Potato Tacos
1 can black beans
2 bay leaves
1 tsp cumin
2 tsp chili powder
1 tsp sweet/smoked hungarian paprika
few solid shakes of black pepper
1 medium zucchini, cubed
8 - 10 mushrooms, roughly chopped (I used cremini from the market, but substitute as you like)
5 - 10 small, heirloom potatoes such as fingerlings, cubed
1/2 c broccoli florets (optional)
1 medium chili pepper, like Anaheim, diced
1 dried hot chili, like serrano, diced as small as you can get it (or sub red pepper flakes)
Juice of one lime, freshly squeezed
corn tortillas
Place black beans and bay leaves in a sauce pan over medium heat with a little water. Add cumin, chili powder, paprika and pepper. Sprinkle some cayenne if you like. Stir occasionally. (Watch to make sure they don’t stick, and add water as needed or they’ll wind up almost refried.) Cook for about 10 - 15 minutes, then turn off heat and allow the beans to sit and develop their flavor.
Dice and boil potatoes in a medium pot until tender.
Pour a fair amount of oil in a large skillet. Saute mushrooms and broccoli, if using, for about two minutes. Add zucchini and chopped chili and stir. Saute for another few minutes until zucchini begins to become tender and everything is fragrant. Drain and add potatoes. Squeeze in the juice of the lime and stir. Add the dried chili, or chili flakes. Using a wooden spoon or spatula, mash about half to three-quarters of the potatoes in the pan. Stir everything really well and allow to cook together for about ten minutes.
Heat tortillas in a medium-sized skillet, flipping twice, until flexible. Fill with beans and vegetable filling. Top with chopped cucumbers, avocado and/or tomatillo salsa (recipe to come), and serve.
Subscribe to:
Posts (Atom)
